How to integrate gasless transactions with Triangle
May 1, 2023
Overview
In this guide, we’ll walk through how to use Triangle wallet and Triangle APIs to execute ERC20 transfer via ERC20 permit, OpenZeppelin Defender relayer and a custom forwarder contract.
Installation
To get started, you'll need to install the Triangle Node.js library:
npm install triangleYou may also use our REST API directly to make requests.
Authentication
Now that you have the Triangle Node.js library installed, you'll need to authenticate using an API secret key. You can view and manage your API keys in the Triangle Dashboard.
import Triangle from "triangle";

const triangle = new Triangle("secret_abc123");
Create a vault
Let's go over what Vaults are in Triangle. A vault is used to generate keys to create a group of wallets. You can think of this just like how Ledger or any other consumer wallet generates a single key that is used to create many wallets.
Typically, you'll create a vault during the user sign up flow of your app so that you can make the relationship between their account and this vault.
Here is an example of how to create a vault:
const vault = await triangle.vaults.create({
  name: "My Vault",
});
Create a wallet
Let's go over what Wallets are in Triangle. A wallet is an just like an externally-owned account (EOA). You can use it just like any other wallet to sign and send any transaction to the network.
Here is an example of how to create a wallet:
const wallet = await triangle.wallets.create({
  name: "My Mumbai Wallet",
  network: "polygon_mumbai",
  vault: vault.id,
});
Then, you can view the address of the wallet like this:
console.log(wallet.address); // 0x2B2Fad169768f6Df40FEee2E39338Fb1966A5dF3After creating a wallet, you may use the available methods to retrieve a wallet's balance, send native currency, list a wallet's NFTs, send an NFT, list a wallet's tokens, and send a token.
Create a relayer via OpenZeppelin
Go to OpenZeppelin Defender to create a relayer in Polygon Mumbai. This will be the address that's going to pay for the gas fee.
Make sure you also create an API key since we will need it to interact with the relayer.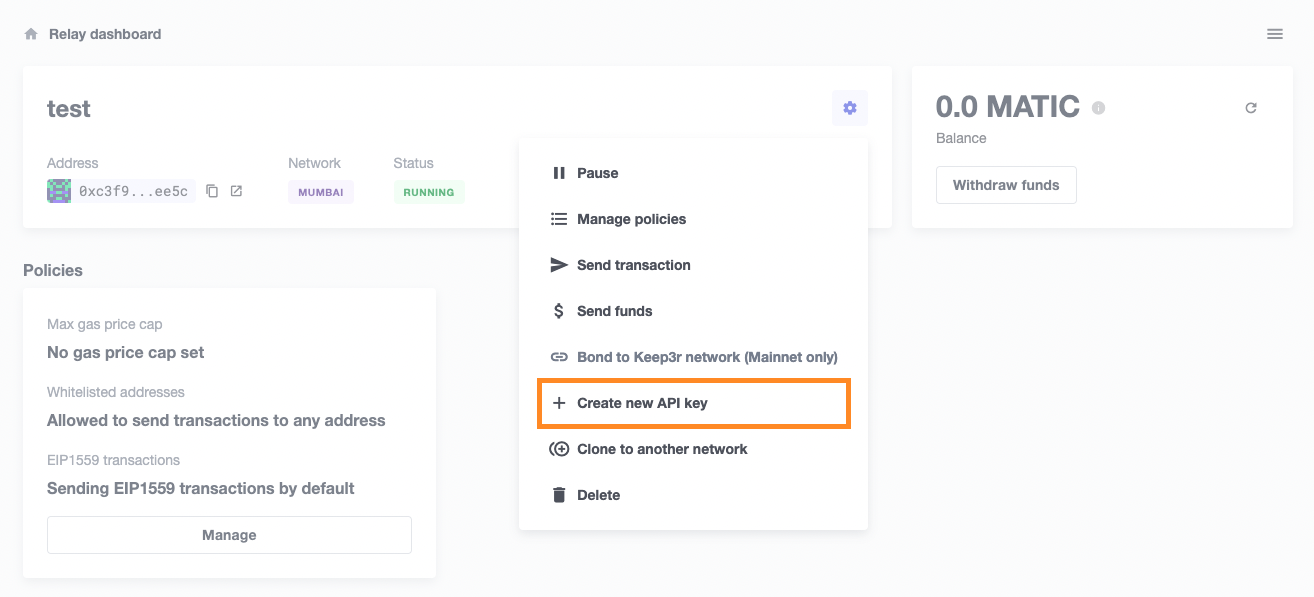
Fund the relayer using Triangle Faucet
Since the idea of gasless is for the relayer to fund the gas for the user, we will need to have some fund in the relayer. Because we are using a test net environment, we could leverage triangle faucet to fund the relayer.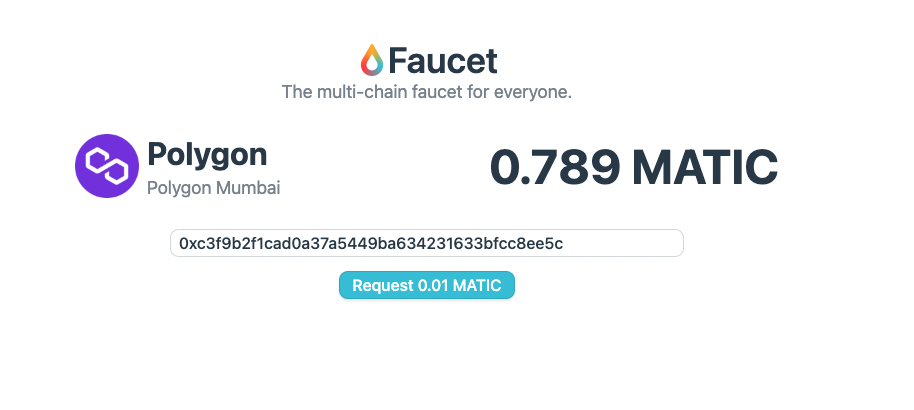
Deploy OpenZeppelin's minimal forwarder
The main tasks of a forwarder are as follows:
1. Verify the signer is the same as the sender of the transaction so that no one can execute a transaction on behalf of someone else.
2. Ensure the nonce is correct, to prevent replay attacks.
3. Execute the transaction.
Thus it's important to make sure your forwarder contract is secure and audited.
For simplcity, we will use the minimal forwarder provided by OpenZeppelin. It's a minimal version of a production-ready forwarder, and is audited by the OpenZeppelin team.
Deploy ERC20 contract with ERC20Permit
In order to approve without using `msgSender()`, we will need to deploy an ERC20 contract with ERC20Permit, which enables addresses to approve using signatures. Here's an example unaudited contract.
pragma solidity ^0.8.0;
import "@openzeppelin/contracts/token/ERC20/ERC20.sol";
import "@openzeppelin/contracts/utils/math/SafeMath.sol";
import "@openzeppelin/contracts/access/Ownable.sol";
import "@openzeppelin/contracts/token/ERC20/extensions/draft-ERC20Permit.sol";
import "hardhat/console.sol";

contract PermitToken is ERC20Permit, Ownable {
    using SafeMath for uint256;
    uint256 public constant MAX_SUPPLY = 1000000000000000;
    uint256 public remaining_supply;

    constructor() ERC20Permit("ABC") ERC20("ABC Token", "ABC") {
        remaining_supply = MAX_SUPPLY;
    }

    function mintWithAddress(address _address, uint256 _amount) public payable {
        require(_amount > 0, "negative amount");
        require(_amount < remaining_supply, "no supply left");
        _mint(_address, _amount);
        remaining_supply -= _amount;
    }
Create and Sign EIP712 Input Data
Here comes the most tricky part of gasless transaction. We will need to create the the transaction with the correct EIP712 format. Because both forwarder and the erc20permit token contract require EIP712, we will need to structure EIP712 typed input data for both of them.
Below is an example of creating and signing the typed input data to give the forwarder an allowance of 500.
Create and Sign EIP712 Input Data for ERC20 Permit
// get the triangle wallet
const wallet = await triangle.wallets.retrieve("wlt...");

const TOKEN_ABI = [...] // ABI of the token contract
const FORWARDER_ABI = [...] // ABI of the minimal forwarder contract
const ADDRESS = {
  forwarder: "<FORWARDER_ADDRESS>",
  tokenContract: "<TOKEN_CONTRACT_ADDRESS>",
};

const provider = new ethers.providers.JsonRpcProvider("<PROVIDER_URL>");
const forwarder = new ethers.Contract(
  ADDRESS.forwarder,
  FORWARDER_ABI,
  provider
);
const tokenContract = new ethers.Contract(
  ADDRESS.tokenContract,
  TOKEN_ABI,
  provider
);

// get the domain separator of the token contract
const domain = {
  name: "ABC",
  version: "1",
  chainId: await forwarder.provider
    .getNetwork()
    .then((n: any) => n.chainId),
  verifyingContract: tokenContract.address,
};
// get the types of the token contract
const types = {
  Permit: [
    { name: "owner", type: "address" },
    { name: "spender", type: "address" },
    { name: "value", type: "uint256" },
    { name: "nonce", type: "uint256" },
    { name: "deadline", type: "uint256" },
  ],
};
// create the message obj for permit call to set the allowance to be 500
const message = {
  owner: wallet.address,
  spender: ADDRESS.forwarder, // set the forwarder as the spender since we will be using the forwarder to execute the transaction
  value: 500,
  nonce: (await provider.getTransactionCount(wallet.address)) - 1,
  deadline: 1782666186,
};

// sign the typed message with triangle wallet API
const signedMessage = await triangle.wallets.signTypedData(wallet.id, {
  encoded: ethers.utils._TypedDataEncoder.encode(domain, types, message),
});
const messageSignature = signedMessage.signature;
// decompose the signature into r, s, v
const r = messageSignature.slice(0, 66);
const s = "0x" + messageSignature.slice(66, 130);
const v = "0x" + messageSignature.slice(130, 132);
Create and Sign EIP712 Input Data for Forwarder (continue from above)
// Create typed data for forwarder and the signature
const nonce = (await forwarder.getNonce(wallet.address)).toString();
const input = {
  from: wallet.address,
  to: ADDRESS.tokenContract,
  data: tokenContract.interface.encodeFunctionData("permit", [ // ERC20 permit function
    message.owner,
    message.spender,
    message.value,
    message.deadline,
    v,
    r,
    s,
  ]),
};
const request = { value: 0, gas: 1e6, nonce, ...input };
const chainId = await forwarder.provider.getNetwork().then((n: any) => n.chainId);
const forwarderTypes = [
  { name: "from", type: "address" },
  { name: "to", type: "address" },
  { name: "value", type: "uint256" },
  { name: "gas", type: "uint256" },
  { name: "nonce", type: "uint256" },
  { name: "data", type: "bytes" },
];
const domain = {
  name: "MinimalForwarder",
  version: "0.0.1",
  chainId,
  ADDRESS.tokenContract,
}
const signature = (await triangle.wallets.signTypedData(wallet.id, {
  encoded: ethers.utils._TypedDataEncoder.encode(domain, forwarderTypes, request)
})).signature;
Execute the message via defender relayer
// Initialize defender relayer
const credentials = {
  apiKey: "<DEFENDER_API_KEY>",
  apiSecret: "<DEFENDER_SECRET_KEY",
};
const defenderProvider = new DefenderRelayProvider(credentials);
const defenderSigner = new DefenderRelaySigner(
  credentials,
  defenderProvider,
  {
    speed: "fast",
  }
);
const defenderForwarder = new ethers.Contract(
  ADDRESS.forwarder,
  FORWARDER_ABI,
  defenderSigner
);

// check if it's a valid signature (signer === from)
const valid = await defenderForwarder.verify(request, signature);
if (!valid) throw new Error("Invalid request");

// defender relayer calls the forwarder contract to execute the transaction
const gasLimit = (request.gas + 50000).toString();
await defenderForwarder.execute(request, signature, { gasLimit });
Check the allowance
After executing the above, we can check the allowance for the forwarder has been modified.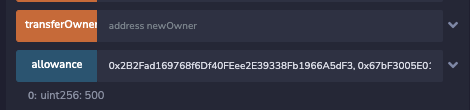
Awesome! Now we can repeat this process again to use `transferFrom` to actually transfer the token.
const RECEIVER = "<RECEIVER_ADDRESS>"
const nonce = (await forwarder.getNonce(wallet.address)).toString();
// transferFrom input
const input = {
  from: wallet.address,
  to: ADDRESS.tokenContract,
  data: tokenContract.interface.encodeFunctionData("transferFrom", [
    message.owner,
    RECEIVER,
    50,
  ]),
};
const request = { value: 0, gas: 1e6, nonce, ...input };
const signature = (await triangle.wallets.signTypedData(wallet.id, {
  encoded: ethers.utils._TypedDataEncoder.encode(domain, forwarderTypes, request)
})).signature;

const valid = await defenderForwarder.verify(request, signature);
if (!valid) throw new Error("Invalid request");

const gasLimit = (request.gas + 50000).toString();
await defenderForwarder.execute(request, signature, { gasLimit });
Check the balance and updated allowance
We should now see the balance of the receiver has increased by 50 and the allowance has been reduced by 50.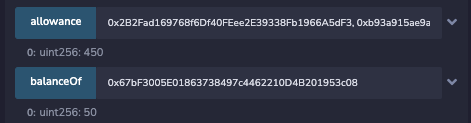
Conclusion
That's how you achieve gasless ERC20 transfer with Triangle. If you have any questions, feel free to DM me on twitter @codywang999 or message in our discord.